|
|
| EXACT CONTACT TRACKER This programme is a special module that may be used with EXACT accounting to track all contacts that your company has with customers. Exact Contact Tracker (ECT) also provides sales management facilities such as special commission reports, various types of commission structures, call sheets for sales personnel, special event tracking and call cycles based on geographical management of customers. In order for this module to function properly you will need the following:
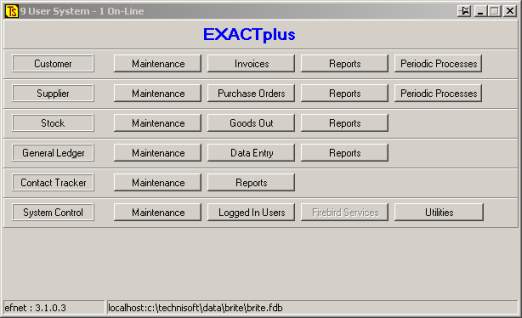
When you have licenced ECT you will see a main menu screen similar to the following:
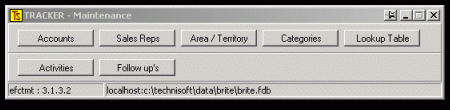
You will notice that the above screen has an extra bar like this:
When you click on the [Maintenance] button you will see:
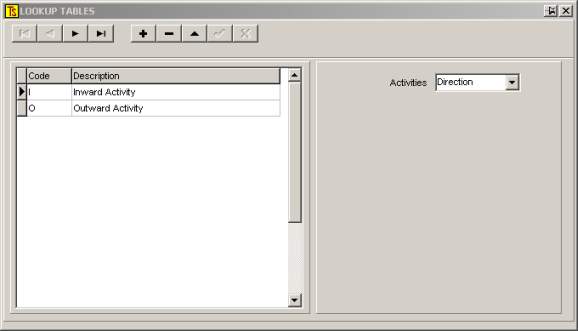
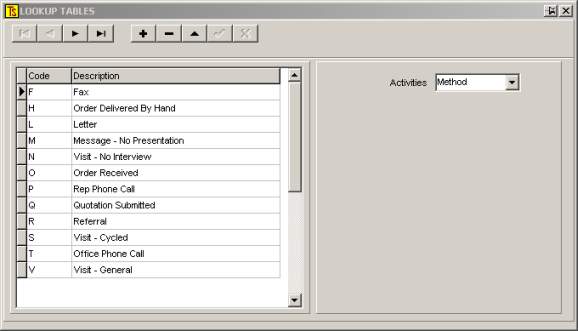
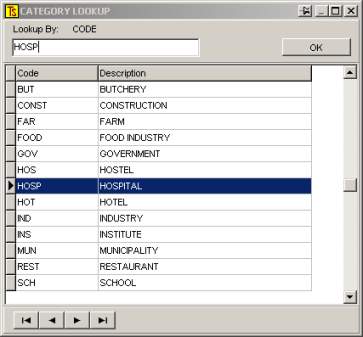
This screen differs from the normal Customer Maintenance screen found at [Customer][Maintenance] in that it has two new buttons, namely [Lookup Table] , [Activities] and [Follow ups] We will deal with each of these in turn. Lookup Table If you select [Lookup Table] you will see a screen similar to this:
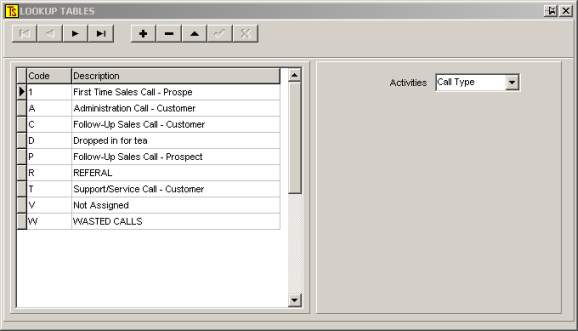
This is where you set up all of the parameters you would like to track. We include a few examples to give you an idea of the sort of things most sales oriented companies would like to record. You may dream up some more or some different types of activities. You will notice that, on the right, there is a selection box that has an arrow to produce a drop down box from which you may make a selection between three types of activity. The choices are Direction, Call Type and Method. The following two screens show examples of the types of activities that may be entered under each type. By pressing on the + button you may add your own types of entries, depending on what type of activities you would like to track. In the above screen there are only two choices for Direction; namely Inward or Outward. This is more or less self-explanatory. An inward activity is one generated by the customer (e.g. he phones you) An outward activity is one instigated by you (e.g. the rep calls on the customer)
Likewise <Call Type> is pretty self-explanatory
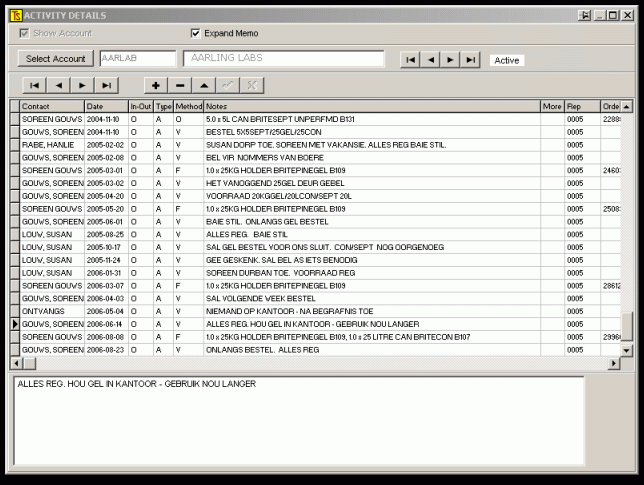
Ditto for <Method> Activities If you escape from these screens back to the main Contract Tracker Maintenance Menu and click on [Activities] you will see something like this:
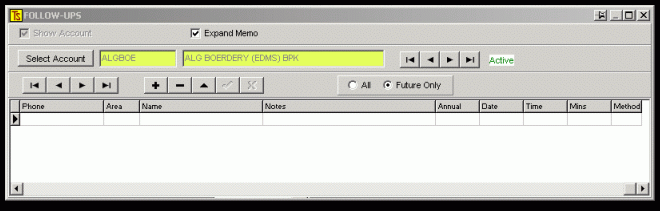
Using the [Select Account] button you may select a customer or potential customer and can see all of the activities that have occurred with this client. If you click on the + button you may add new activities, and this is how all activities are captured. The usual sources for new activities are: Telephone calls to and from the client Faxes or e-mail from the client Sales Representatives daily or weekly call sheets Orders placed by the customer In the latter instance no entry need be made through this module because the information will automatically be entered into this module when the invoice is processed. You can see from the above that the system can build an entire history of all interactions between your company and the existing or potential customer. Follow ups When the [Follow ups] button is pressed a screen like this will appear:
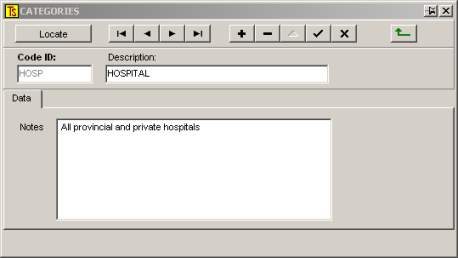
Select a customer using the [Select Account] button. If there are any future events for the customer, they will be displayed. You may add new events by clicking on the + button You will see that there is a field for the following information: Phone Area Selectable from a drop-down box Name Also selectable from the list of contacts in the customers record. Notes Type anything you wish in this field Annual This field may be toggled on (1) or off (0) An on setting would be for annual events such as contacts birthdays, anniversaries, etc. Date - A drop-down calendar is available for a date selection. Time - A time for an appointment may be added Mins. - The expected time required for an event Categories and Areas In order for the ECT to function properly it is suggested that you make use of the Categories and Areas facilities. Categories are used to order your customers on reports and areas may be used to provide call sheets for the reps that will suggest calls on customers that are close to one another geographically. The following shows the screens that need to be maintained. Firstly the [Categories] facility exists in the [Contact Tracker][Maintenance] module. If
this button is clicked a screen like this appears: Here you may enter various categories that you may decide upon in order to filter various reports. Click on the + to add or the to delete categories. The screen below is the type of screen that would appear if you press the [Locate] button after you have entered some categories. It is included to give you examples of the sort of categories you might decide upon.
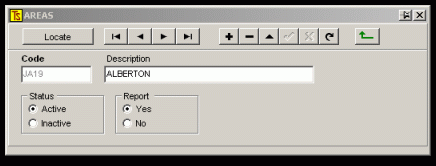
Areas Once
you have entered the categories you should enter Areas. One way to do this is to draw the areas onto a road map and to number them adjacently, rather like the manner in which the pages of a standard urban map book are organised. Select the [Area / Territory] button from the Contract Tracker Maintenance menu. You should see something like this:
Using the normal methods, insert your areas. You will notice that areas may also be active or not, and may appear on reports or not. Customer Maintenance Once you have entered all of your areas and categories you may proceed to capture this information into your customers records. To do this you must go to [Customer][Maintenance][Accounts] and select an account to work with. Note that although there is the facility to go to the same records by clicking the [Accounts] button from the Contact Tracker menu, you will not be able to edit a record from here because whilst sales-people may need to view data, they do not have access to change the information. Select a customers record and click on the <Rep / Area> tag. You should see something similar to this:
You will observe that this is where you would enter the relevant information regarding the customers category and the area where he is situated. You may also determine how often you would like the sales representative to call on the customer. (Call frequency) Running Contact Tracker Once you have set up your reps, areas, categories, customers and activities as described above, you will be ready to run the system and enjoy all of the management functions. Each and every contact that the company has with the customer should be logged, by processing the activity via ECTs [Activities] screen, as described above. Invoices and credit notes are tracked automatically. Contact Tracker Reports Once you have captured sufficient historical data to give meaningful information you can start getting useful reports out of the system. Go
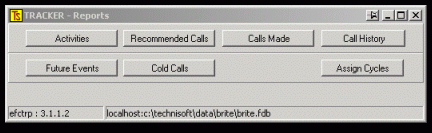
to [Contact Tracker][Reports] and
you will see this:
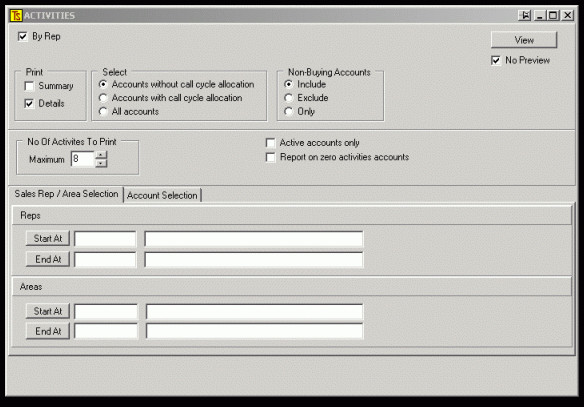
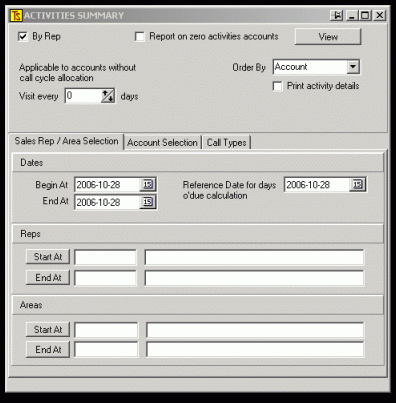
Select [Activities] A screen similar to this will appear:
You
will see that various selections can be made from within this screen. Starting at top left you will see that the reports can be ordered by Rep. If you select this option the reports will print out in order of the reps to whom the reports will be issued. If you have a lot of sales personnel for whom you are generating reports, it may be advisable to select the <No Preview> button so that you do not need to return to the report and instruct it to print after each sales persons report has been completed.
A detailed report will give you a report on the activities of the selected range of customers, showing when they bought last, etc. These reports print one customer to a page and you may select the number of Activity occurrences to print on each page. <Number of Activities to Print> will determine how many activities to print on a detailed report. You
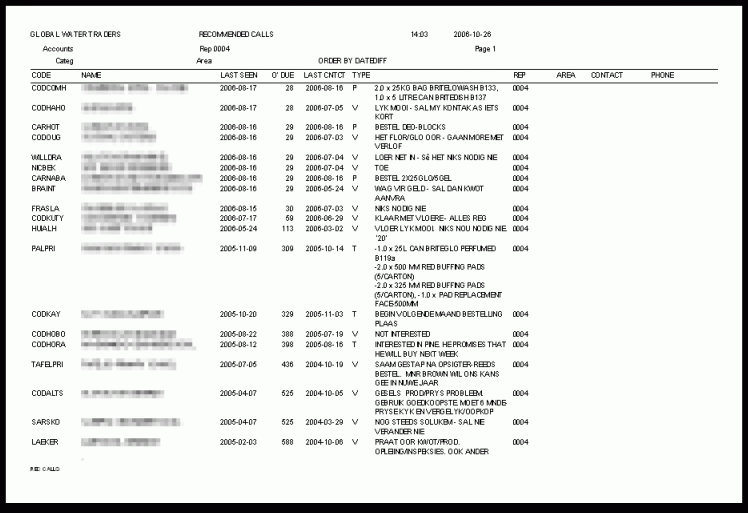
may also select Active accounts only, Further filtering of the report may be done by selecting, on the relevant tags: A range of Reps or Areas to report on A range of customers or categories of customers to report on Now you may go on to [Recommended Calls] This
will show a screen like this: You may decide to order these reports by rep, but if this option is selected, then no preview of the report is possible it will print directly to the printer when you click [View] You may exclude those accounts that annoyed you so much you had them terminated. [Terminated Accounts] You may exclude those accounts with a call frequency set to zero, but if this is deselected, then you should determine the interval since the last reps call that should be cause the system to regard the customer as being overdue for a call. The reports may be ordered in several self-explanatory ways and the usual selection of Reps, Areas and/or Accounts and Categories may be made. Once you have made your selections and clicked [View] the computer will think for a while whilst apparently doing nothing and then produce a report that may look something like:
The next report to consider is the [Calls Made] report. Selecting
this button gives the following screen: This
screen is more or less self-explanatory and will give a report, ordered
by Sales Rep, of all of the activities selected. Next comes the [Call History] report that brings a screen like this:
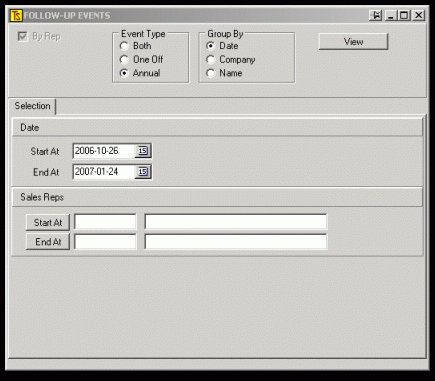
The fields and options are pretty much self-explanatory. The next report is the [Future Events] report, which will give you a screen like
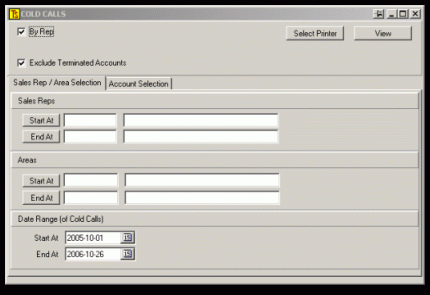
Make your selections and click [View] You will get a report for each rep of the future events that are to occur with his / her customers. (Things like birthdays, anniversaries, etc) Now we come to the [Cold Calls] report
The selections are self-evident. The report is very useful in that, at the end of each reps report it gives the total number of accounts (cold calls) made during the selected time period, the number of visits made to these accounts over the period, the number of contacts with the customer and the total monetary value for the sales made to these customers. This is a very useful report to determine the relative efficiencies of your sales people. The
last selection in this section is the [Assign Cycles] button. This is a facility to allocate the customers that the sales person has in his area to a call schedule that is based upon the number of calls that a rep can make per day. You may enter the number of weeks per cycle that you would expect the rep to use. This is normally greater than 4, but less than 9, but the important thing is to try and avoid a 4 week cycle or any multiple of 4. This is in order to stagger the calls made to customers in such a way that you will not always be calling on the same customer at the end of a month. The [Max Calls] is the maximum number of calls that you would expect the salesperson to be able to make during one week. This report will indicate whether a sales person has too many customers to attend to properly (or too few). If, for example you set a 5 week cycle and you know the rep can do 25 calls per week, the report will allocate (Sorted by geographical area) the first 25 customers to the first week, the next to the second week and so on until it has gone through all of the customers assigned to a sales person. If, at the end of the day there are only 4 weeks filled with calls, then you know that there is room for that sales person to build up his customer base. If, on the other hand, the report goes to 9 weeks, then you know that the rep is over-extended and cannot give his customers adequate service. If the options Allocate New Cycle Groups to Rep is selected, then the reps records will be adjusted to take the new groups into consideration when preparing the report. If the Commit new allocation after reporting selection is made, then the changes will become permanent when the report has finished printing and these new parameters will be used for calculating documents such as work sheets, etc. Other Reports If you go to [Customer][Reports] Sales Reps you will see a selection of four menu items, namely: Sales - Summary or Details of a Reps sales over a selected time. The sales rep may be linked to a customer account or to invoices. In other words, if a rep is linked to accounts, then the report will display all transactions of customers who have that specific Rep in their records. If a Rep is linked to the invoices, then the report will report on all invoices where the Rep was entered as the Rep for that specific invoice, over-riding the normal Rep who would get commission on that account. Note: it is probably a good idea to run the summary reports in both modes each month to see if there is a difference between these reports and investigate the reasons Commission - A report showing sales Reps commissions in various forms Worksheets - Produces worksheets for the sales Reps, helping them to plan their calls properly. Export Sales -Allows the export of Reps sales information in various formats to an Excel spreadsheet FOR A PRINTER-FRIENDLY PDF VERSION GO HERE |